Sales document search API implementation using enosix SAP Connector for Mule 4
Instructions cover for both RAML and OAS specification, please use the type of API specification you are interested in.
Pre-requisites to follow along this tutorial
- Anypoint Studio installed and in working condition.
- enosix SAP connector for Mule 4 trial account or valid license.
- Download the sales document RAML or OAS specification.
Steps to create mule sales document search API
- Open Anypoint studio and create a new Mule project as shown screenshotted below.
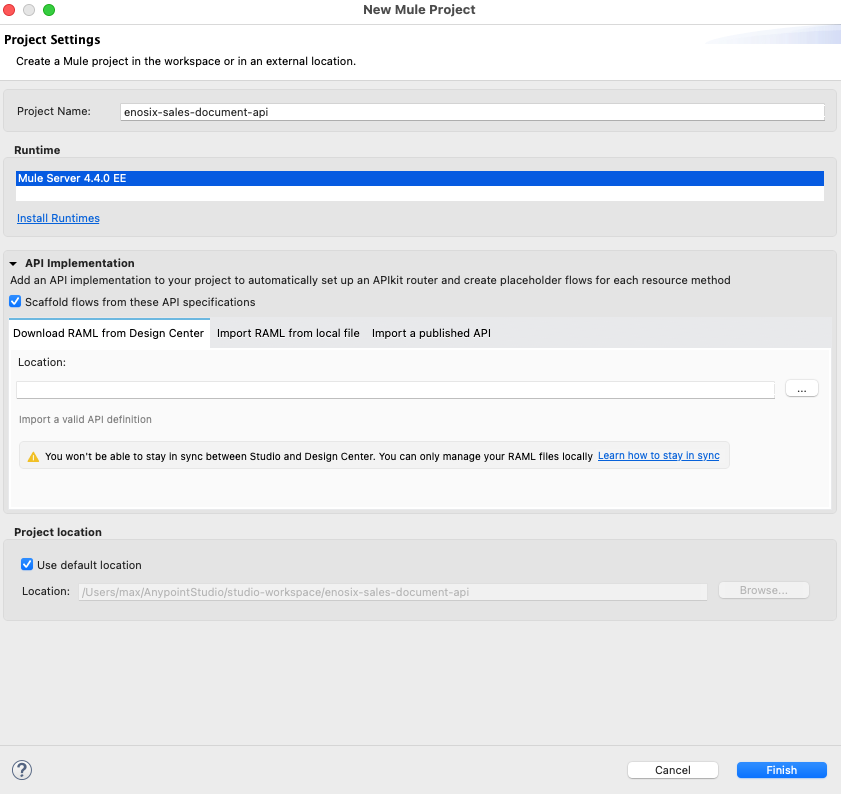
- Make sure Scaffold flows from these API specifications check mark selected. You can use the RAML or OAS from local file system or import a published API option(from exchange), depends on if you have RAML or OAS locally, or directly refer from exchange as maven dependency.
- If you selected local file system choose the RAML Sales_Document_Search-1.0.1-raml.zip or OAS SalesDocument_OAS location and click the Finish button. Skip step 4 & 5 go to 6.
- Make sure you have downloaded RAML zip file or OAS json, uploaded to your exchange. Choose import a published API, click green + (Add new dependency) button, you will be prompted to enter exchange credentials. Search for Sales Document, you will find Sales Document Search RAML or SalesDocument_OAS OAS file, here is the screenshot for RAML.
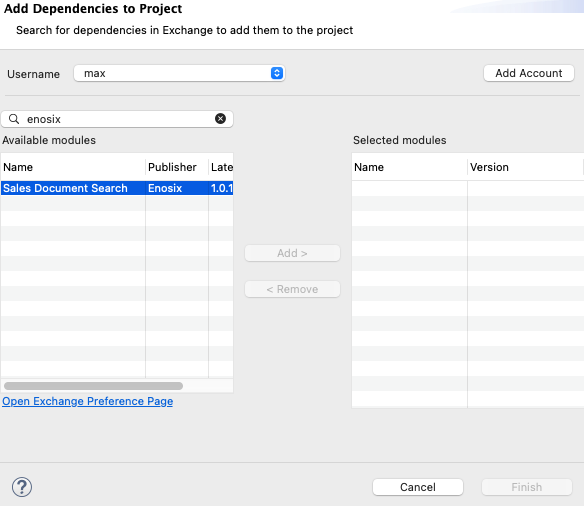
- Select the Sales Document Search RAML file or SalesDocument_OAS OAS and click Add> and Finish button.
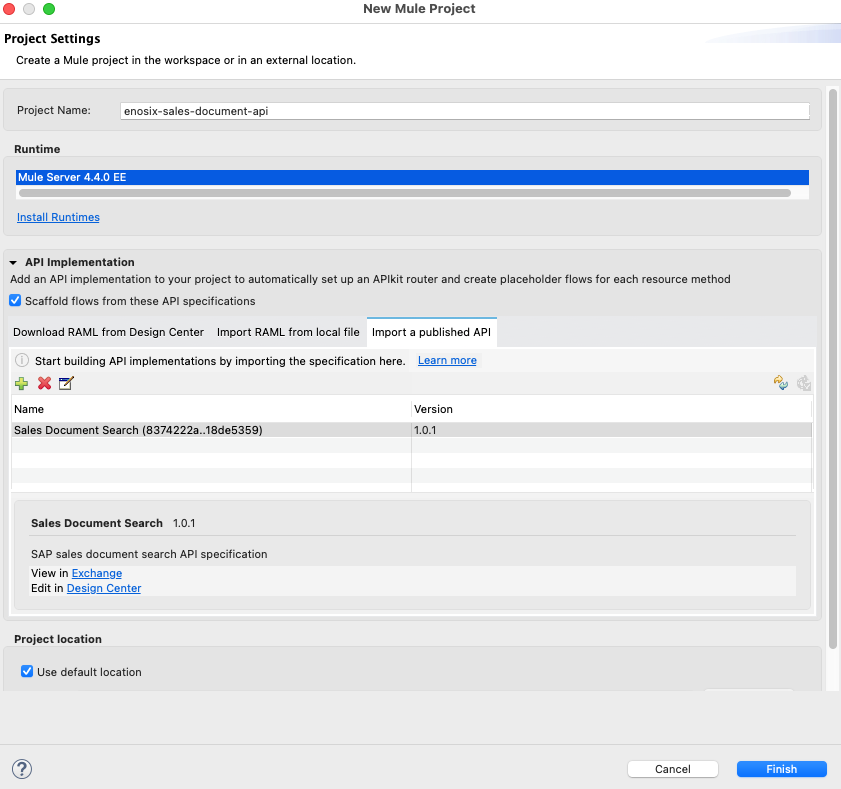
-
Now the base project with scaffold flow is created with main apikit router, apikit console and end point implementation skeleton private flow.
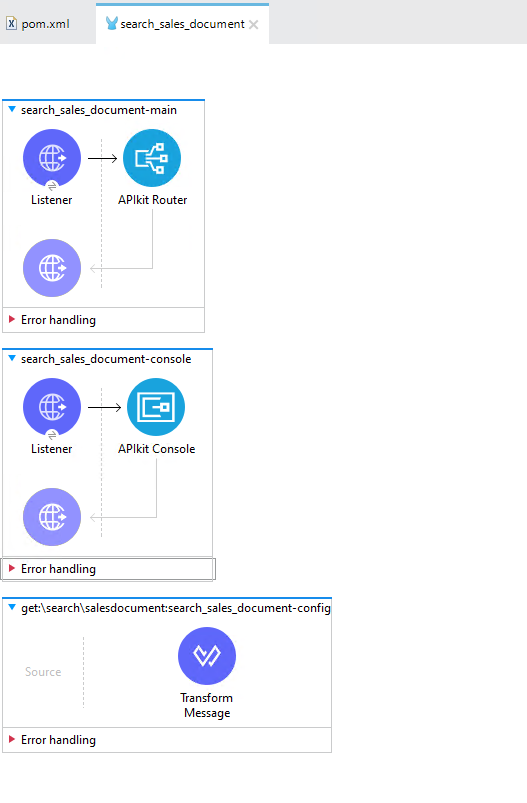
-
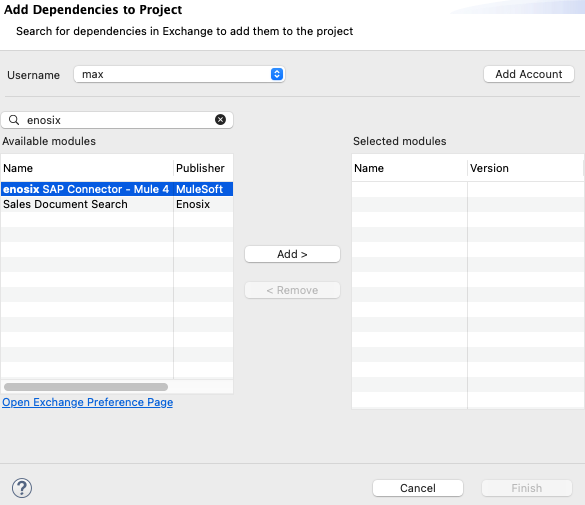
Now add enosix SAP connector for Mule 4 dependency to project. Click the search in exchange in Mule Palette, if you are not already logged in, login to exchange and search for enosix. You will find enosix SAP Connector - Mule 4.
-
Click Add> and Finish button, enosix connector dependency is added to your project. Make sure you have below dependency in pom.xml.
<!-- Dependency for enosix SAP Connector -Mule 4 -->
<dependency>
    <groupId>com.enosix.mule</groupId>
  <artifactId>enosix-connector</artifactId>
  <version>5.0.1</version>
  <classifier>mule-plugin</classifier>
</dependency>
-
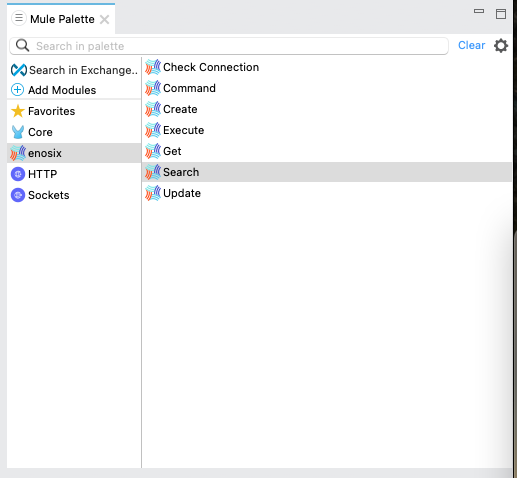
Drag and drop search operation from Mule Palette enosix connector into endpoint implementation private flow.
-
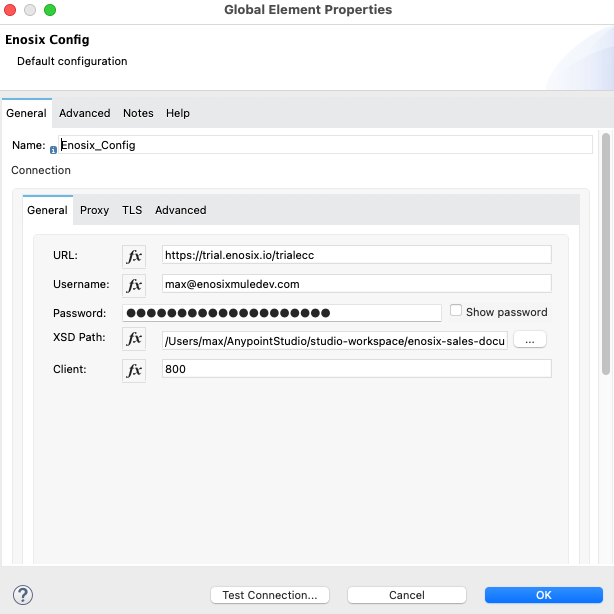
Configure search operation, create a global configuration for connector by selecting green + in search operation configuration.
URL:
https://trial.enosix.io/trialeccUsername: enter the username for enosix SAP framework you received in your trial signup email.
Password: enter the password for enosix SAP framework you received in your trial signup email.
XSD Path: create a new folder xsd under src/main/resource and give the path here.
Client: enter the SAP instance client number.
Go to TLS tab, select Edit inline and select Insecure option.
Click Test Connection operation, once connection tested successful, click OK button.
Global configuration completed.
-
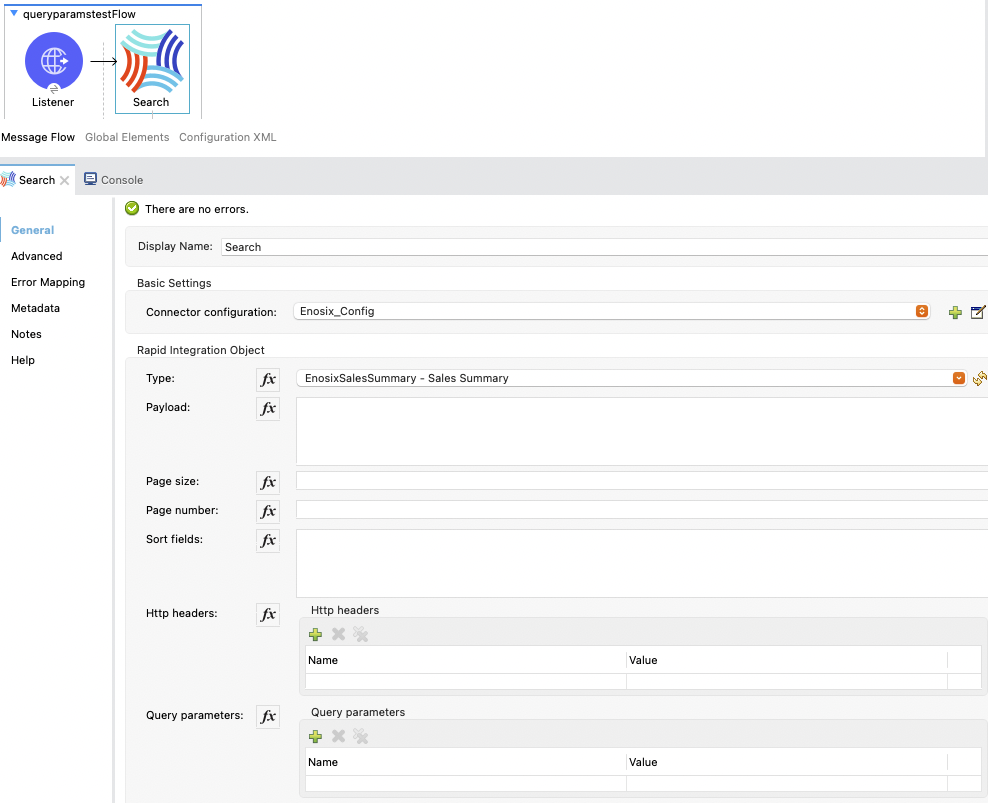
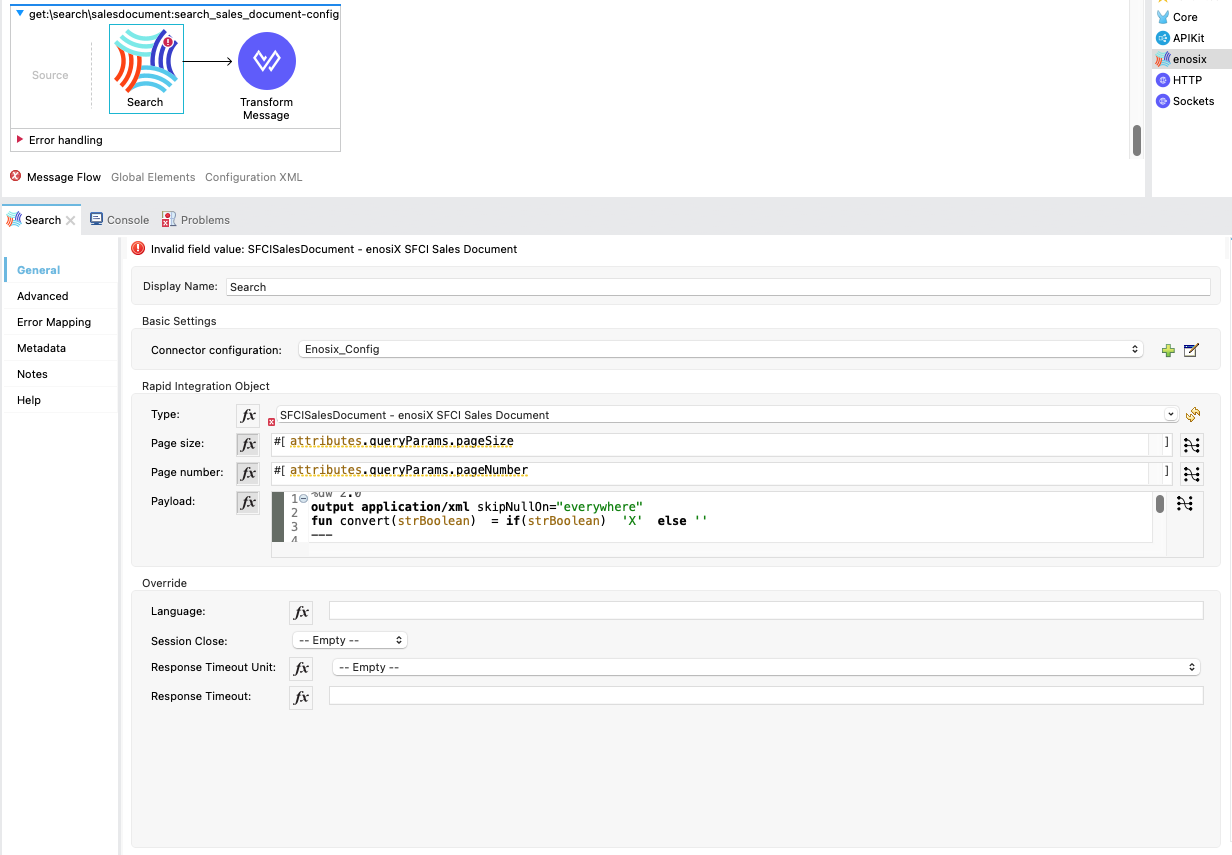
Enosix_Config has been configured with valid values, fill out the remaining config parameters for the General section for the Search operation.
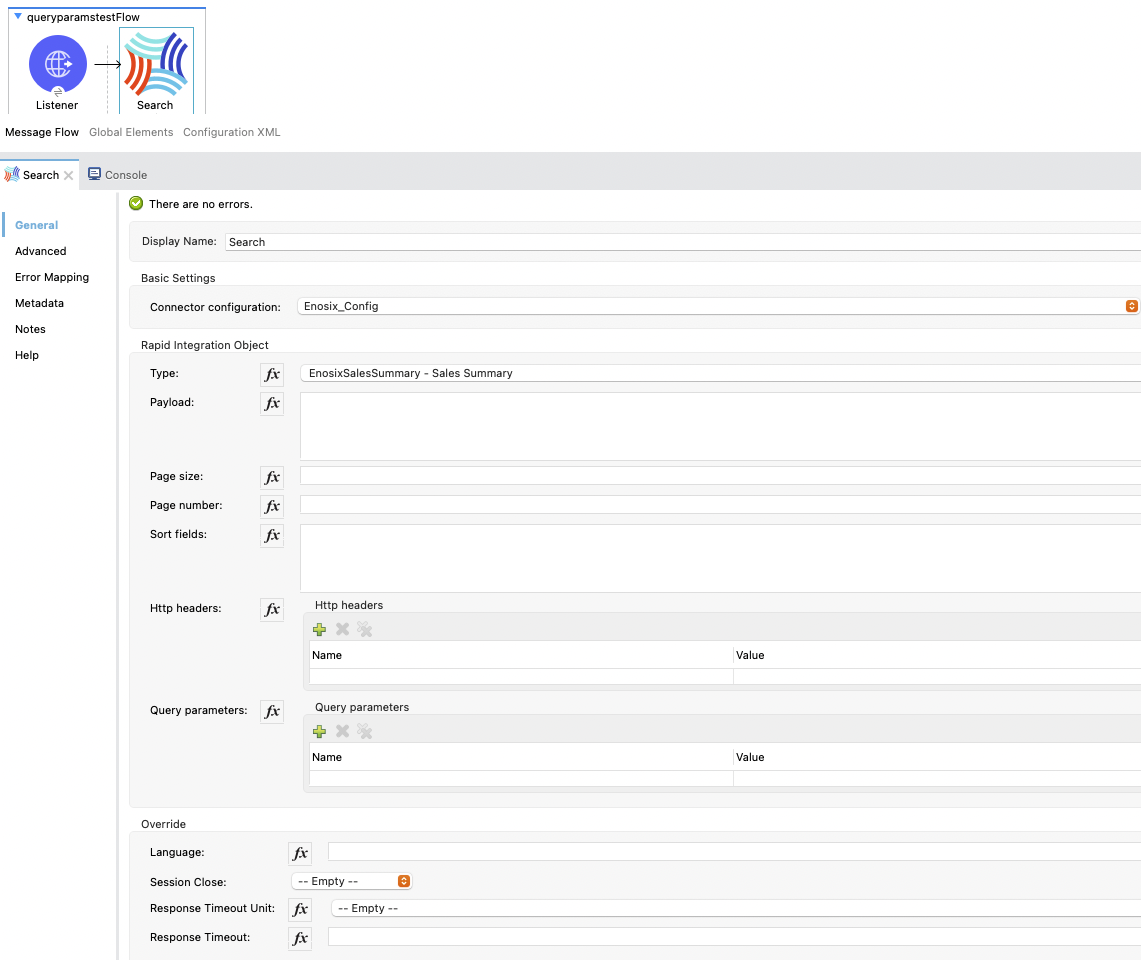
Select Type SFCISalesDocument from drop down list.
Click the fx icon for Page size, Page number and Search Input as we are entering the expression for these three parameters.
Enter Page size as
attributes.queryParams.pageSize.Enter Page number as
attributes.queryParams.pageNumber.Enter the following dataweave code into the Search payload field. This dataweave code is creating XML input format required for connector.
    %dw 2.0
    output application/xml skipNullOn="everywhere"
    fun convert(strBoolean)  = if(strBoolean)  'X'  else ''
    ---
    SFCISalesDocument_SC: {
      SEARCHPARAMS @(CompletedOnly: convert(attributes.queryParams.completedOnly as Boolean default false),
      CustomerPONumber: attributes.queryParams.customerPONumber,
      FromCreateDate: attributes.queryParams.fromCreateDate,
      FromSalesDocumentNumber: attributes.queryParams.fromSalesDocumentNumber,
      Leading: attributes.queryParams.leading,
      Material: attributes.queryParams.material,
      OpenOnly: convert(attributes.queryParams.openOnly as Boolean default false),
      SalesDocumentVersionNumber: attributes.queryParams.salesDocumentVersionNumber,
      ShipToParty: attributes.queryParams.shipToParty,
      ShipToPurchaseOrderNumber: attributes.queryParams.shipToPurchaseOrderNumber,
      SoldToParty: attributes.queryParams.soldToParty,
      ToCreateDate: attributes.queryParams.toCreateDate,
      ToSalesDocumentNumber: attributes.queryParams.toSalesDocumentNumber,
      TransactionGroup: attributes.queryParams.transactionGroup,
      Username: attributes.queryParams.username,
      X_BillingBlock: convert(attributes.queryParams.billingBlock as Boolean default false),
      X_CreditBlock: convert(attributes.queryParams.creditBlock as Boolean default false),
      X_DeliveryBlock: convert(attributes.queryParams.deliveryBlock as Boolean default false),
      YourReference: attributes.queryParams.yourReference,
      tablerowstate: 'inserted' ) : null
    }
- Search operation configuration completed, your configuration should look like below screenshot.
- Work on the transformation step to convert search operation xml to json. Click on the Transform message dataweave component, remove the sample json document out there. Copy and paste below dataweave code into transformation.
%dw 2.0
output application/json skipNullOn="everywhere"
fun convert(strBoolean)  = if(strBoolean)  'X'  else ''
---
{
"PageInfo": {
"PageSize": attributes.pagingInfo.pageSize,
"PageNumber":attributes.pagingInfo.pageNumber,
"TotalRecords":attributes.pagingInfo.totalRecords
},
"SalesDocuments": [
  payload.SFCISalesDocument_SR.*SEARCHRESULT map {
    "SalesDocument": $.@SalesDocument,
    "CustomerPONumber": $.@CustomerPONumber,
    "CreateDate": $.@CreateDate,
    "SalesDocumentType": $.@SalesDocumentType,
    "SalesDocumentTypeDescription": $.@SalesDocumentTypeDescription,
    "SoldToParty": $.@SoldToParty,
    "SoldToName": $.@SoldToName,
    "SoldToCity": $.@SoldToCity,
    "SoldToRegion": $.@SoldToRegion,
    "SoldToRegionDescription": $.@SoldToRegionDescription,
    "SoldToCountry": $.@SoldToCountry,
    "SoldToCountryDescription": $.@SoldToCountryDescription,
    "ShipToParty": $.@ShipToParty,
    "ShipToName": $.@ShipToName,
    "ShipToCity": $.@ShipToCity,
    "ShipToRegion": $.@ShipToRegion,
    "ShipToRegionDescription": $.@ShipToRegionDescription,
    "ShipToCountry": $.@ShipToCountry,
    "ShipToCountryDescription": $.@ShipToCountryDescription,
    "NetValueInDocumentCurrency": $.@NetValueInDocumentCurrency,
    "TaxAmountInDocumentCurrency": $.@TaxAmountInDocumentCurrency,
    "SDDocumentCurrency": $.@SDDocumentCurrency,
    "OrderStatus": $.@OrderStatus,
    "SalesDocumentVersionNumber": $.@SalesDocumentVersionNumber,
    "YourReference": $.@YourReference,
    "ShipToPurchaseOrderNumber": $.@ShipToPurchaseOrderNumber,
    "TransactionGroup": $.@TransactionGroup,
    "DeliveryBlock": $.@DeliveryBlock,
    "DeliveryBlockDescription": $.@DeliveryBlockDescription,
    "BillingBlock": $.@BillingBlock,
    "BillingBlockDescription": $.@BillingBlockDescription,
    "CreditBlock": $.@CreditBlock,
    "CreditBlockDescription": $.@CreditBlockDescription,
    "DeliveryStatus": $.@DeliveryStatus,
    "DeliveryStatusDescription": $.@DeliveryStatusDescription,
    "TotalQuantity": $.@TotalQuantity,
    "GoodsIssuedQuantity": $.@GoodsIssuedQuantity,
    "LastChangedDate": $.@LastChangedDate,
    "StartDate": $.@StartDate,
    "EndDate": $.@EndDate,
    "CUSTOM01": $.@CUSTOM01,
    "CUSTOM02": $.@CUSTOM02,
    "CUSTOM03": $.@CUSTOM03,
    "CUSTOM04": $.@CUSTOM04,
    "CUSTOM05": $.@CUSTOM05,
    "CUSTOM06": $.@CUSTOM06,
    "CUSTOM07": $.@CUSTOM07,
    "CUSTOM08": $.@CUSTOM08,
    "CUSTOM09": $.@CUSTOM09,
    "CUSTOM10": $.@CUSTOM10
    }
  ]
}
- Now the code is completed for API implementation, save and run the project . Make sure flow started without any errors by checking the console logs.
- Send a request from postman / browser in this format http://localhost:8081/api/search/salesdocument?soldToParty=2200&pageSize=100&pageNumber=1
Complete source code for this API is available here you can download and run in Anypoint studio.
Make sure you update the properties file with correct information