Grant Login Access to enosix Support
When working with enosix Support to resolve issues, you may need to grant them temporary access to your Salesforce organization. This guide provides step-by-step instructions for granting login access to enosix Support.
Steps to Grant Access
-
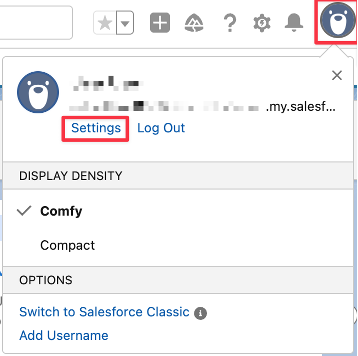
Navigate to Profile Settings
- Within Salesforce, click the user profile icon
- Click on
Settings
-
Grant Account Login Access
- Click on "Grant Account Login Access"
-
Configure Access for enosix Support
- For "enosix Support" choose
1 Monthfor the "Access Duration" - Click
Save
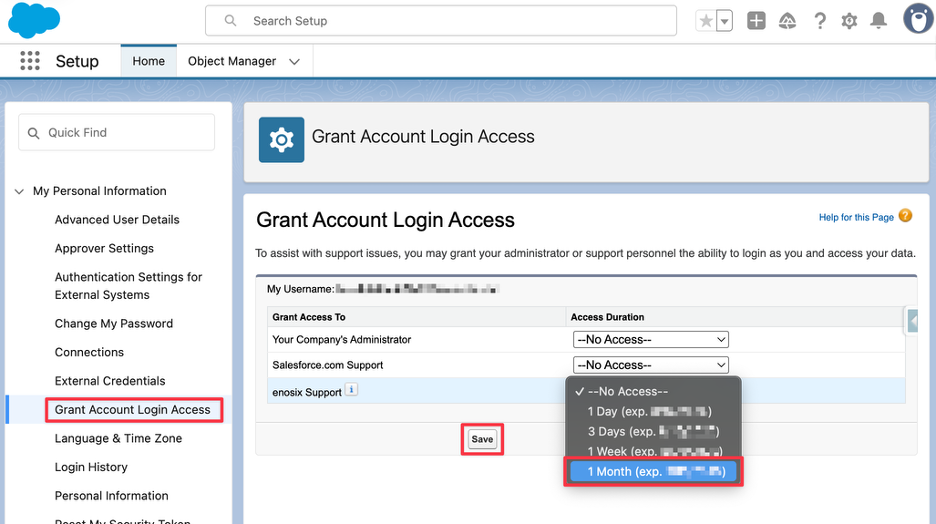
- For "enosix Support" choose
-
Note the Expiration Date
- Record the expiration date to report it on the support ticket
-
Get Organization ID
- Navigate to Setup > Company Information
- Copy the "Salesforce.com Organization ID"

-
Report Information on Support Ticket
- On the enosix support ticket, report the following information:
- Salesforce.com Organization ID
- Salesforce Username
- Access Expiration Date
If you need to create a support ticket, visit our Requesting Support page to access the support portal.
- On the enosix support ticket, report the following information:
Template to Report
Use this template when reporting the access information on your support ticket:
Salesforce.com Organization ID: [Your Org ID]
Salesforce Username: [Your Username]
enosix Support Access Expiration: [Expiration Date]
Important Notes
- Access is granted for 1 month to provide sufficient time for troubleshooting
- Make sure to record the exact expiration date when granting access
- Provide all three pieces of information (Org ID, Username, and Expiration Date) to the support team
- This access allows enosix Support to log into your organization to troubleshoot issues directly