Connection to SAP
Connect supports two methods of connecting to your SAP system (see Apps for more info):
- Connection by URL to a proxy
- Connection using SAP Cloud Connector inside of SAP Business Technology Platform
Note that in both cases, the account credentials used are only for the Connect console to be able to query the API availability on the source system. In most use cases, account credentials (which might also be for a service account) will be passed on each API call, rather than using the credentials configured here.
If you already use Link to connect the enosix framework to Salesforce, you will already have the cloud connector setup complete. In that case, you can start with creating a DestinationConnection by URL
Using this connection approach, no additional setup is needed beyond configuration of your proxy.
Connection via SAP Cloud Connector
SAP Cloud Connector is a reverse proxy solution provided by SAP to natively connect to applications (like your Connect end points) running in SAP Business Technology Platform. It consists of an on-premise component (sapcc) that connects to your SAP system and a connector inside SAP BTP.
Important Cloud Connector Notes/Warnings
Cloud Connector subaccount
Cloud connectors must be setup in the same subaccount as you intend to deploy your Connect apps.Many customers choose to use separate connectors for their dev and production instances.
Cloud Connector Security Certificate Expires Annually
The subaccount certificates in SAP Business Technology Platform expire annually. Renewing them is simple (just a click), but if not done all connectivity through Cloud Connectors in the subaccount will be lost.This article outlines how to do this: https://blogs.sap.com/2020/01/11/sap-cloud-connectivity-issues-due-to-expired-certificate
Install and configure SAP Cloud Connector (sapcc) on-premise component
sapcc is an appliance provided by SAP for accessing on-premise SAP servers using secure outbound tunnel to SAP Cloud Platform. Cloud Connector Security
Install
Use the SAP Cloud Connector install guide or use a community provided docker image.
- Install Cloud Connector
- If installing on Windows, it is recommended to use sapjvm - Windows x64 in place of the Oracle JVM/JDK. sapcc needs the JDK, will not run with just the JRE/JVM.
- Extract zip file and copy the whole folder to
C:sap - Create new system environment variable
JAVA_HOME=C:SAPsapjvm_8 - Append
;C:SAPsapjvm_8binto the systemPathenvironment variable
- Extract zip file and copy the whole folder to
- Install sapcc-2.15.1-windows-x64.msi
- Set JDK path to
C:SAPsapjvm_8 - Login to Cloud Connector Administration portal with default credentials. (Assumes default port of 8443)
- User:
Administrator - Password:
manage
- User:
- Set JDK path to
- If installing on Windows, it is recommended to use sapjvm - Windows x64 in place of the Oracle JVM/JDK. sapcc needs the JDK, will not run with just the JRE/JVM.
- Another alternative is to use Cloud Connector Docker Image (Community)
Configuration
Add subaccount
In the Cloud Connector admin portal
- Region: This should match the region of the subaccount in Cloud Foundry (and it needs to be the same subaccount where you will be running your Connect end points), check your subaccount or trial subaccount and ensure the region listed in the subaccount matches the region selected when adding the subaccount.
- Subaccount: the value is the Id of the subaccount and not the SubDomain. The ID can be obtained using the info hover or the details tab in the SAP Cloud Platform Cockpit.
- Display Name: enter the subdomain Subaccount User & Password: Use an authorized user account in the subdomain. If you started a trial use your trial credentials.

Cloud to on-premise
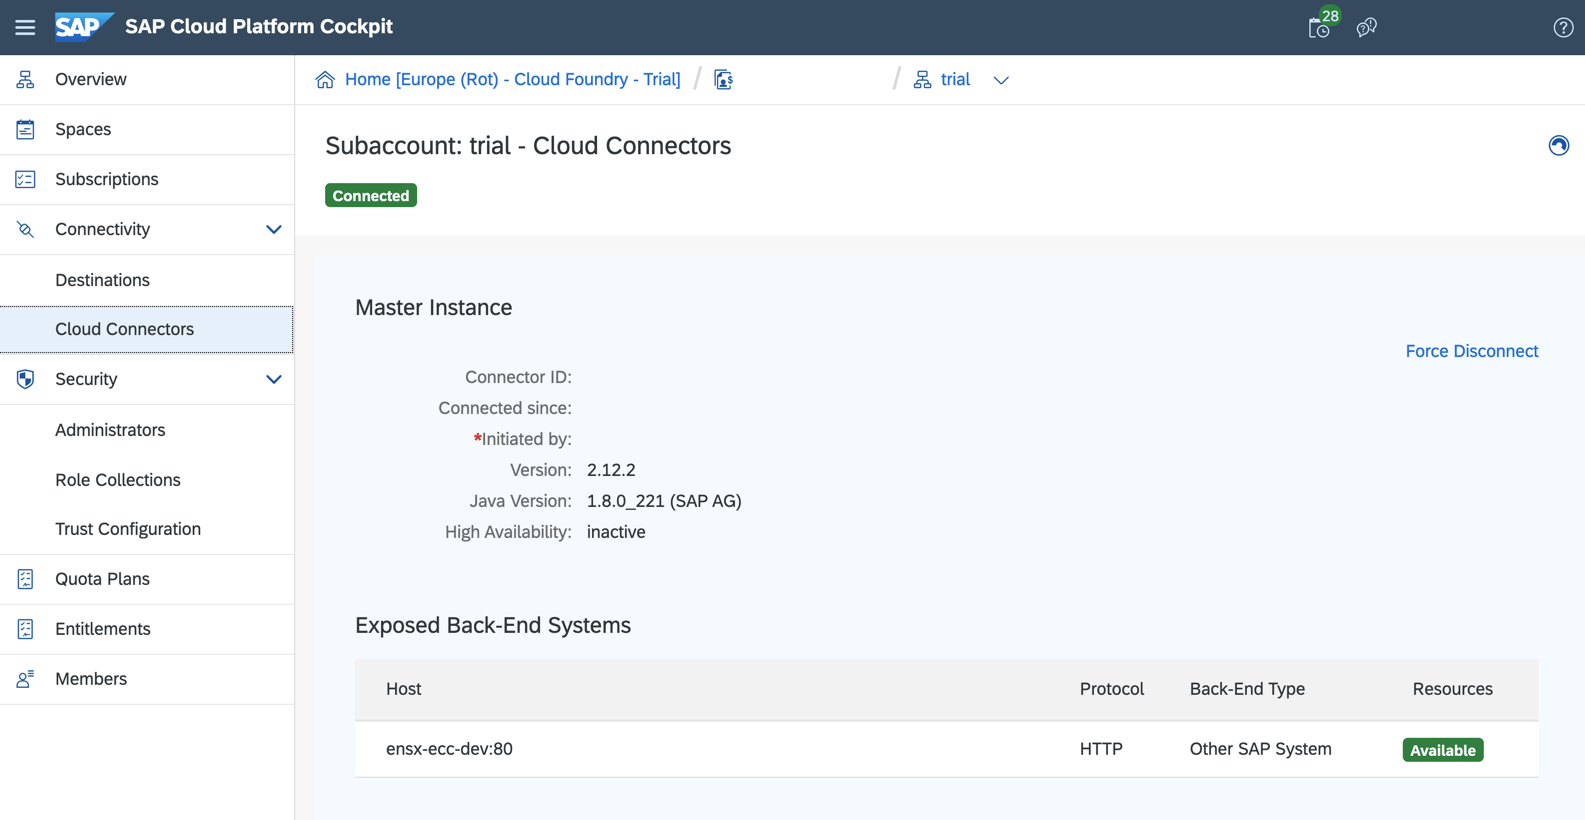
In the subaccount add a new System Mapping.
- Back-end Type: Other SAP System
- Protocol: HTTP
- Internal Host: dns name or ip of the SAP ECC/S4 HANA system
- Internal Port: port, e.g. http port 8000
- Virtual Host: create a unique name for the virtual host. (e.g. sap-dev)
- Virtual Port: 80
- Principal Type: None
- Host In Request Header: Use Virtual Host
- Description: leave blank or provide the system name.
- In the summary check the checkbox (Check Internal Host) [X]
- Click [Finish]
Under Resources add a Resource
- URL Path:
/enosix/paca - Active: [X]
- Access Policy: (x) Path And All Sub-Paths
Create a destination
Finally, you need to create a destination to map the cloud connector to a destination service that can be used by Connect.
You will need the virtual host and virtual port from the previous section for the Cloud Connector you'd like to access in Connect (on the "Cloud Connectors" tab).
Select Connectivity | Destinations from the subaccount menu and add a new Destination.
- Name: Enter a name (this will be visible in Connect when selecting an SAP system to attach to an app)
- Type: HTTP
- Description: Optional
- URL: Use the host and port from above, followed by
/enosix/paca(for example,http://sap-dev-ecc:80/enosix/paca) - Proxy Type: OnPremise
- Authentication: BasicAuthentication
- Location ID: leave blank or match the Location ID configured in the SAP Cloud Connector
- User/Password: valid credentials for the SAP system and client ID specified (typically a service account) - these will be used by Connect to query available APIs during end point configuration; they will also be used if you configure an end point to not authenticate individual calls
- SAP Client: in order to authenticate to a non-default SAP Client, you must add an
sap-clientproperty to the destination using the New Property button.
Example destination with sap-client = 100 and using Basic Authentication

Network connectivity
If your on-premise network requires whitelisting of IP addresses, the correct entries can be found here and here.