Configuring Custom Detail Pages Using Lightning Flow
Summary
You can customize which fields you want displayed for a document detail and/or item detail page by creating and configuring a new SAP Sales Document Details flow.
Configure a New SAP Sales Document Detail Flow
- Go to Setup.
- Use the Setup Quick Find box to search for "Flows", then click the Flows link (under Process Automation). The Setup Flows page displays.
-15dddc3828898d38985a26d0b65c20b4.png)
- Click on the SAP Sales Document Details flow label link. The Flow Builder displays.
-b2635434efe165008c5e7aff69f52aa4.png)
- Double click on the document detail or item detail page screen interaction element that you want to customize (example: SAP Delivery Detail).
Edit the Component's Properties
- Click on the component you want to configure (example: SAP Delivery Detail).
-3f712a7310594fd9f3b8df7d226137e3.png)
-
Fields are listed on the right-hand side of the Edit Screen modal.
- Fields that have GlobalConstant.True = will be displayed in the component.
- Fields that have GlobalConstant.False = will NOT be displayed in the component.
- Components that allow you to change the title or define custom field labels have free text fields that allow you to manually enter a value.
-
Follow these steps to change a field's value:
- Click in a field.
- Remove the current value.
- Select the new value (GlobalConstant.True or GlobalConstant.False).
-5b094cfd22a5146573bcf748e57c9c46.png)
Repeat the Process for Each Property
- Click the Done button after you've made all of your desired changes to all components for a screen element.
- Repeat the preceding steps for each screen element that you want to customize on the various document / item detail pages.
Save and Activate Your New Flow
After you've made all of your desired customizations, you must save and activate your custom flow. Follow these steps:
Save Your Flow
- Click the Save As button in Flow Builder.
- In the Save As modal, enter a name for your custom flow in the Flow Label field (example: SAP Delivery Detail Custom). The Flow API Name field will use your Flow Label text to auto-generate a unique name that will be used by the Salesforce API.
- You can enter a brief description of your custom flow in the Description field.
- Click the Save button
Activate Your Flow
-54699009b678b4c9988d045275850773.png)
- Your flow is created and is set to "Inactive" status. Click the Activate button in Flow Builder.
- Your custom flow is active.
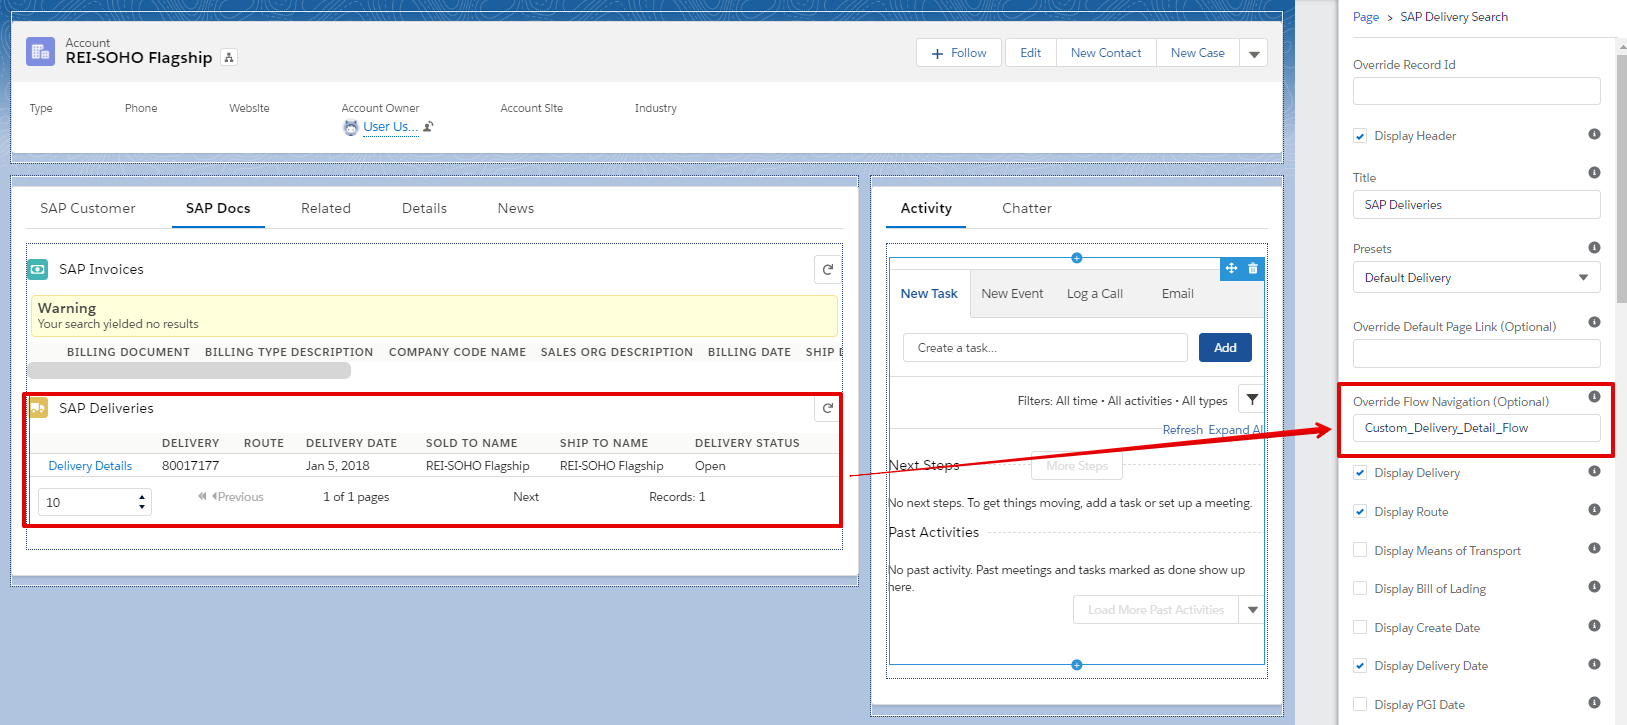
Configure a Lightning Component to Use the New Detail Flow Override
- Go to the Accounts tab and select an account.
- Click on the Setup cog icon and click Edit Page to open the Lightning App Builder.
- Select the Lightning components that you want to use the new detail flow.
- Enter the API name of the flow that you want that component to use when displaying a detail page.

- Click Save, then click the Back (<-) arrow.
- Click on the detail link to the left of a document in the list for that component.
- Your customized detail page should display.